


How To Change A Bandsaw Blade & Install A New Blade
Posted on 21st August 2023 at 17:15
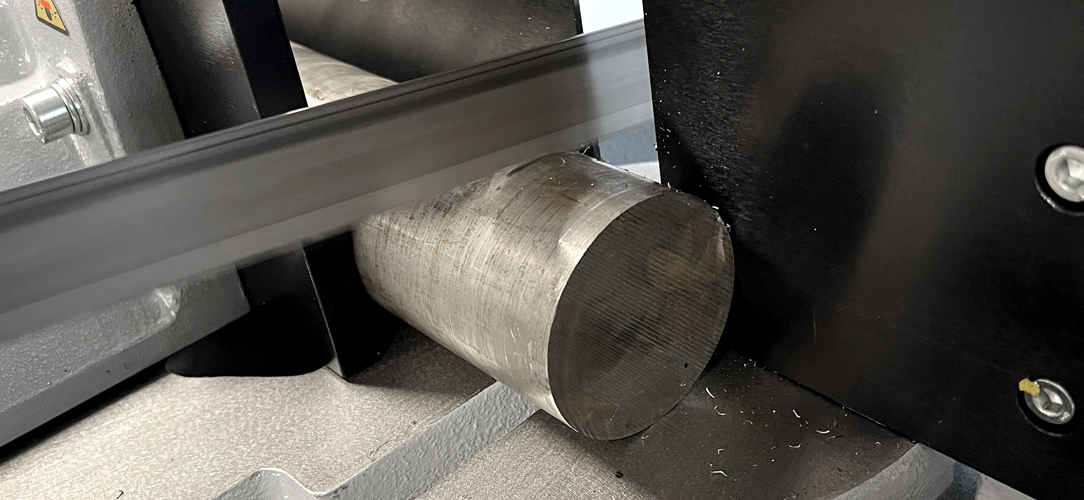
The bandsaw, with its singular ability to execute both uneven freehand cuts and precise uniform cuts, has established itself as a cornerstone in workshops, be it for woodworking, metalworking, or other fields that demand meticulous cutting.
Like any other tool, the bandsaw's effectiveness doesn't rest solely on its operation but significantly on the state of its most integral component - the blade.
A worn or damaged blade not only impairs the bandsaw's functionality but also compromises the quality of work. Consequently, the knowledge of when to change the bandsaw blade and how to install a new one is as essential as understanding the operations of the bandsaw itself.
There's more to this process than simply removing the old blade and replacing it with a new one. It encompasses various steps that demand careful attention. Read on to discover how to install and change a bandsaw blade like a professional, so you can ensure the longevity of your blade and improve cutting performances.

Key Preparation Tips For Bandsaw Blade Replacement
The first phase of replacing a bandsaw blade is the preparation stage. A mindful approach to this phase can mean the difference between a seamless process and a potentially hazardous one. Given the heavy-duty nature of the bandsaw and the inherent risks in handling the blade, it's paramount to prioritise safety measures and approach each step with care.
Disconnecting Power & Securing The Machine
The most fundamental precaution to take before embarking on the blade replacement process is disconnecting the power supply. This action is not merely switching off the machine but completely unplugging it from its power source.
This ensures that the bandsaw is devoid of any electrical current, thereby eliminating the risk of accidental startups that could lead to severe injuries. Once you've successfully disconnected the power, secure the machine to prevent any unwanted movements during the process.
Releasing Blade Tension & Removing The Old Blade
Having gained full access to the blade, the next step involves releasing the blade tension. This adjustment typically involves manipulating a knob or a lever designed for this purpose on the bandsaw. Turning or moving this lever reduces the blade's tautness, making it easier to remove.
Prepare The Blade Guides
The final part of this phase is preparing the blade guides for the new blade. The blade guides—both upper and lower—must be loosened to provide enough space for the new blade. Adjusting these guides can often be done with a simple turn of a screw or knob on the bandsaw, but consult your bandsaw's manual to confirm the procedure.

Preparing The New Bandsaw Blade
Preparation of the new bandsaw blade is a step that sets the stage for the actual installation. As such, it is one that demands care, attention, and a meticulous approach. While it may appear straightforward, it holds within it potential pitfalls that can lead to unnecessary accidents or damage to the new blade.
Carefully Unpacking And Uncoiling The Blade
Most new bandsaw blades come tightly coiled in a compact package for convenience and safety. However, this coiling also poses a challenge—it needs to be carefully unpacked and uncoiled. When dealing with a coiled bandsaw blade, wearing protective gloves is highly recommended.
The sharp teeth can easily cause injury, and the stored tension in a coiled blade can cause it to spring open unexpectedly. To uncoil the blade, find a spacious area with no obstructions. Hold the blade with both hands, ensuring that your grip is firm, then with a gentle yet deliberate motion, allow the blade to uncoil.
Inspecting The Blade For Any Defects Or Damage
After successfully uncoiling the blade, the next step is a thorough inspection. Although new, the blade is not immune to defects or damage. It might have sustained damage during packaging, shipping, or storage.
Firstly, examine the blade's teeth. They should be sharp, evenly spaced, and free from any visible signs of damage. Also, ensure that the teeth are facing in the right direction—downwards and towards the table. Misaligned or damaged teeth can compromise the blade's cutting ability and might even be a safety hazard during operation.
The next step is to check the blade's body- look for any kinks, bends, or deformities. A good blade should have a consistent, flat body free from any bends or distortions. These might seem minor, but such defects can lead to poor cutting performance and might cause the blade to break during operation.

Installing The New Blade- Tips & Tricks
With the old blade removed and the new blade prepared, you are now ready to install the new bandsaw blade. The installation process might seem daunting at first, especially if you've never done it before, but with the right knowledge and a little patience, it can be straightforward.
Aligning The Blade Teeth Direction
First and foremost, when you're installing a new bandsaw blade, it's crucial to align the blade teeth correctly. The direction of the teeth determines the cut's orientation and is therefore vital to ensure a proper cut. The teeth should be facing downwards and towards the table. This orientation ensures that the cut occurs on the downstroke, thereby minimising the risk of kickback.
Feeding The Blade
Once the teeth are correctly oriented, the next step is to feed the blade through the blade guides and around the wheels. This part of the installation process can be tricky and requires care and patience. Ensure the blade sits squarely on the wheel tires and threads properly through the blade guides. The blade should nestle comfortably in the centre of the wheel without hanging off the edge.
Ensuring Proper Blade Tracking
After the blade is in place, you need to adjust the blade tracking. Blade tracking refers to the blade's position on the wheel. Proper tracking is essential for the blade to run true and not come off during operation. The blade should ideally be centred on the wheel's crown. If it's not, you can adjust it by tilting the wheel's top or adjusting the tracking knob.
Adjusting Blade Tension
Finally, you need to adjust the tension of the blade. The tension of the blade is a critical factor that directly influences the blade's performance and lifespan. Too loose, and the blade might slip or deflect, leading to poor cuts. Too tight, and you risk putting undue stress on the blade, which could lead to premature failure.
Adjusting bandsaw blade tension involves a balance- the blade should be tight enough that it doesn't slip or deflect during normal cutting operations, but not so tight that it risks breaking or deforming the wheels.

Setting Up Blade Guides & Reassembling Machinery
To ensure optimal performance and safety, you need to set up the blade guides correctly and reassemble the machinery. Neglecting this stage could lead to subpar cutting performance and a shorter lifespan for the blade.
Adjust Upper & Lower Ball Bearing Guide
Blade guides play a pivotal role in the performance of the bandsaw. They stabilise the blade during operation, preventing deflection and ensuring that the blade tracks correctly. Your bandsaw will likely have upper and lower guides, each consisting of either block guides or ball bearing guides, or a combination of both.
If your bandsaw uses ball bearing guides, they require a slightly different adjustment. Unlike block guides, ball bearing guides should touch the blade. The side bearings should spin only during a cut, while the rear bearing should spin when pressure is applied to the blade. If they spin constantly, they are too close, and if they don't spin during a cut, they are too far. Adjust them accordingly to achieve this balance.
Adjust Upper & Lower Block Guides
Block guides should be adjusted so that they are just shy of touching the blade when it's not in motion. Start with the side guides. They should be positioned such that they bracket the blade without touching it, providing support without causing friction that could prematurely wear out the blade.
Next, adjust the thrust guide—the one located at the back of the blade. This guide prevents the blade from moving backwards when pressure is applied to the blade during a cut. It should be positioned such that it only makes contact with the blade when the blade is pushed back.
Ensuring Smooth Lade Movement
Once the guides are set, check for smooth blade movement by manually rotating the wheels. The blade should move effortlessly without any hindrance. If the blade does not move smoothly, further adjustments may be necessary.
Reassemble Table Inserts, Fences & Guards
Next, it’s essential to reassemble the removed components, by replacing the table inserts, fences, and guards back into their rightful places. Be sure to handle these components with care to prevent any damage. Once they are reinstalled, verify the alignment and tension of the blade one last time. This can be done by conducting a test cut on a scrap piece of wood to ensure that the blade operates as expected.
Verifying Proper Blade Alignment & Tension
Setting up the blade guides and reassembling the machinery isn't simply a post-installation routine; it's a vital stage that ensures the overall efficiency of your bandsaw and safeguards its performance. By committing to careful execution, you pave the way for seamless operation and the longevity of your new blade.

Breaking In The Blade
The initial operation of a new bandsaw blade, also known as breaking in the blade, is a crucial phase often overlooked. Jumping straight into full-speed cutting with a brand new blade could lead to shortened blade life, poor cutting quality, or even blade failure. Therefore, understanding the importance of proper blade break-in and the associated steps is key.
Importance Of Proper Blade Break-In
Breaking in a bandsaw blade is the process of honing the blade's teeth. Each tooth on a new blade is razor-sharp with a thin edge that can be brittle. Cutting material at full speed and force immediately can chip or blunt this edge, leading to reduced blade life and poor cutting performance. Therefore, it's essential to start slowly and gradually increase the blade's load to ensure a longer life and better performance.
Break-In Steps For Different Blade Types
The break-in process differs slightly for different types of blades due to their unique tooth geometry and material. However, the general principle remains the same - starting with a reduced cutting rate and gradually increasing it.
To begin the break-in process, reduce the blade speed and feed rate. The speed should be around 50% of the normal operating speed, and the feed rate should be about 25% of the regular feed rate. During this phase, it's important to monitor the cut closely to ensure that the blade is cutting smoothly and is not experiencing excessive force.
After a few minutes of cutting at this reduced rate, gradually increase both the speed and feed rate. The increments should be small and gradual, giving the blade ample time to adjust to the increasing load. Repeat this process until you reach the normal operating speed and feed rate.

Prolonging Bandsaw Blade Life
A bandsaw blade is a significant investment, and prolonging its lifespan should be a top priority for every operator. The longevity of a bandsaw blade does not rely solely on the quality of the blade itself but also hinges heavily on the operator's habits and maintenance practices.
Regular Blade Maintenance
Regular blade maintenance is an essential component of blade longevity. This routine involves periodic cleaning and inspection of the blade. Over time, pitch, sap, and dust can accumulate on the blade's teeth, reducing its cutting efficiency and causing undue stress.
Regular cleaning with a mild detergent or a blade cleaner can prevent this buildup and keep your blade cutting smoothly. Furthermore, the blade should be inspected regularly for signs of wear or damage. This inspection allows you to spot potential issues early and prevent catastrophic failures that could lead to a shortened blade life.
Proper Tensioning And Alignment
Tensioning is another key factor in prolonging blade life. It might seem intuitive to set the tension as high as possible to prevent blade slippage. However, overly tightened blades are under constant stress, which can lead to premature blade failure.
On the other hand, blades that are not tensioned enough will slip or deflect during cutting, resulting in poor cut quality and excessive wear on the blade. Striking the right balance in blade tension is crucial for optimal blade life and performance. It's recommended to refer to your bandsaw's manual or use a tension gauge for this purpose. Keep in mind that tension should be released when the saw is not in use for extended periods to prevent blade fatigue.
Proper blade alignment is another crucial aspect. If the blade is not tracking correctly on the wheels, it could lead to premature wear on the blade and possibly damage to the bandsaw itself. Regularly check and adjust the blade's alignment to ensure it tracks correctly on the wheels. This process might require some adjustments to the blade guides or the tilt of the wheels, depending on your bandsaw model.
Using Appropriate Blades For Different Materials
Lastly, using the appropriate blade for each type of material is a key to prolonging bandsaw blade life. Different materials require different blade tooth configurations for optimal cutting. Using a fine-toothed blade on thick, hard material might lead to overworked teeth and shortened blade life. On the contrary, using a coarse-toothed blade on thin, soft material could lead to rough cuts and potential blade damage. Therefore, it's vital to select the appropriate blade for each type of material.
If you require assistance on choosing a new blade for your bandsaw machine, here at Any Length we offer a wide range of machine matched bandsaw blades for your cutting needs.
If you are unsure which blade you need for your machine or specific usage application, get in touch with our expert team who will be able to help you find exactly what you need.
Share this post: